


You know what’s the best part about crocheting a baby blanket? The border! Crochet borders can make your blanket look more like a hand-made gift and less like a generic store-bought throw. With so many options out there, it can be hard to know where to start. Thankfully, we’ve put together the definitive guide for crochet borders so that you can choose your favorite style and get started right away.
Scalloped Picot Edge
You can create a scalloped picot border with this crochet pattern. It’s a pretty neat trick and will make your blanket look even better!
Here’s how it works:
- You will be working in rows, rather than rounds. This means that you need to turn at the end of each row, so you only have to work on one side of your project at a time.
- Create just one stitch for every two rows along the edge of your blanket (the same way you would if you were making stripes). For example, if your blanket measures 40 inches wide by 60 inches long and has 100 stitches across its width (100 x 2 = 200), then you will want to create 50 single crochet stitches along its length (200 – 100 = 100). This gives us an even number of stitches per row—a convenient way of keeping things balanced while we work on our border!
Ruffle Trim
The ruffle trim is made by crocheting the blanket and attaching it to the blanket with a crochet hook. You can make ruffles in any color you like, but we recommend staying away from bright colors when you’re making a baby blanket because they tend to fade over time. If you want to add more than one layer of ruffles, just make sure your stitches are loose enough so that they lay flat on top of each other without puckering. The best way to do this is by crocheting loosely and carrying your yarn up as you go along (this way, if you run out of yarn at any point during the process, it won’t be noticeable). You’ll also need to wash your completed project before adding any ruffles so that there’s no acrylic residue left behind!
You’ll want something soft like cotton for this project since babies are sensitive about what touches their skin; however if for some reason cotton isn’t available then acrylic would work too since it doesn’t irritate like wool does sometimes which makes sense considering how much time babies spend sleeping or playing with toys made from materials such as fleece blankets or stuffed animals…
Granny Squares
Granny squares are a classic crochet pattern and the perfect way to make a baby blanket. To create one, you’ll need about 30 grams of yarn per square (a ball typically weighs 50 grams), a 4mm crochet hook, and any color combination you like.
To start, chain 5 stitches into a ring:
- Insert hook in second stitch from hook*
Repeat *to end* with remaining stitches in ring (you should have 4 loops on your hook). Pull through all four loops at once to complete the first single crochet stitch. Chain 3 more times to finish off round 1. Now you should have six single crochets surrounding your initial chain 2 space (which counts as two stitches if you’re counting).
Round 2: Continue working into same space as chain 3 made by previous round’s single crochet; *single crochet into next two stitches* twice around entire square; repeat from * onwards until there are only three unworked stitches left at corner of first row.*Single Crochet three times into corner space*. Repeat steps above until there are 12 rows total and then finish off by making one final row of Single Crochet in each stitch across entire square (including any spaces between groups of five). You can now join new squares together using these instructions: https://www.homeditcom/how-to-join-granny-squares/.
Shell Edging
Shell edging is a very simple border to add to any blanket. It’s made up of multiple shells, each shell being made up of 2 dc stitches. It can be made in any size you want and can be used as either a single or double crochet border if that suits your taste better.
To begin, chain 4 and slip stitch into the first chain to form a ring:
Ch 1 (counts as 1st sc here and throughout), 6 sc into ring:
Pull long end through last loop on hook; tighten knot at base of ch-1:
- Ch 5 (counts as 1st dc, ch 2), sk next 2 sts; rep from * across blanket edge; join w/sl st in 3rd ch of beg ch-5:
Herringbone Stitch
This stitch is a combination of the half double and double crochet stitches. It can be worked in rounds or rows, depending on what you’re making. There are several variations of this stitch, but we’ll only cover the basic version here.
If you’d like to start working with this stitch, I recommend using a light-colored yarn so that it’s easier to see where your stitches are going. Practice by crocheting a swatch with different sized hooks until you have a feel for how many stitches are being worked per row or round. You’ll also want to make sure that your tension is even across all your rows/rounds—if some areas seem tighter than others, try switching up your hook size until everything fits together smoothly without gaps between stitches (or at least as few gaps as possible).
Double Rows of Puff Stitches
- Make a puff stitch by making a chain of two, then wrapping the yarn over your hook and pulling through the loop.
- To make these double rows, ch 6 (this is the start of each row), turn and make 5 more puff stitches in the same way.
- Connecting them is easy: slip stitch into each hole along one side of the square that you just made, then connect it to another corner using a normal slip stitch. Repeat on other side to complete your border.
No matter what kind of border you want to add, you can learn how to do it by going online and finding instructions that are tailored to your skill level.
No matter what kind of border you want to add, you can learn how to do it by going online and finding instructions that are tailored to your skill level. You can find many different options for baby blanket borders.
Why use a border? A crocheted border adds a finished edging to any blanket project to give it a clean, polished look. Basically, borders a just a quick and simple way to add a little something extra to a blanket project.
Top Reason to Use Borders
- Finished look to edges of blankets
- Hide mistakes + imperfections
- Add a contrasting color or different color to a blanket
- Easy way to add texture to a blanket
Depending on the crochet blanket or blankets you are making, it may or may not call for a border. If the blanket doesn’t require a border, you can still add one using one of the edging techniques shown below for a cleaner look.
Each simple crochet border tutorial below may require a certain stitch count to get the same outcome as shown, so keep this in mind when choosing a border for your afghan.
Tip: The border may turn out differently than the tutorial when a different yarn or crochet hook size is used.
<
YARNS FOR CROCHET BORDERS
There are many ways to add interest with yarn. Sometimes in crochet patterns, you may see a blanket pattern with a different color border. This is a great way to add an extra pop to any blanket design.
You may also see from time to time a different weight of yarn being used to in borders because this can add texture as well as interest!
Take a look below are a few of my favorite yarns to use in blankets and borders, so scroll over them above to learn more.
After you take a look at the list, please let me know which blanket border edge is your favorite. You can let me know in the comments or over in the Easy Crochet Facebook group.
We are nice. Promise!
THE BEST CROCHET BORDERS FOR BLANKETS
Use this collection of easy to learn blanket borders to complete your next crochet blanket project.
Camel Stitch Blanket Border Pattern

This camel stitch border is great to add a clean finished look to any blanket or afghan! No exact stitch count is needed to use this border, so you’ll get a wide crochet border every time with no worrying about counting.
Find the camel border pattern from Winding Road Crochet with a free written tutorial and video lesson.
Picot Crochet Border Edging
Any crochet blanket would look great with a picot border. This is an easy to crochet edging pattern and is perfect for beginner crocheters. If you can single crochet and chain, you can create this border!
Find the free picot border pattern (photo tutorial!) from Easy Crochet, along with a bonus picot border tutorial.
Shell Crochet Edging + Border
This shell stitch border is perfect to add to any crochet blanket to give it a classic look. This crochet shell edging border is great for baby blankets and adds a bit of a ruffled look. Use a solid color yarn in a contrasting color to add a pop of color.
Find the free shell crochet border tutorial at Lullaby Lodge.
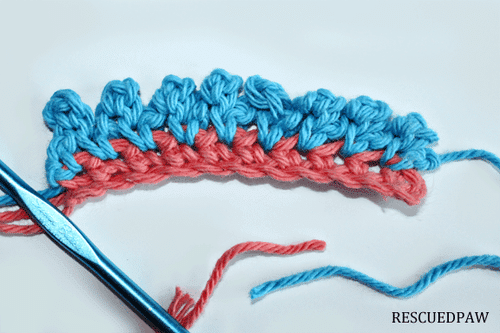
Easy Ribbed Double Crochet Border
If you can double crochet (one of the basic crochet stitches), then you can make this beautiful textured border for your afghan! This design pattern looks complicated but it actually a simple border with a video tutorial that will help. Take your blanket to the next level with this fun (+easy) edging uses double crochet stitches.
Find the free ribbed crochet border tutorial at Daisy Farm Crafts.
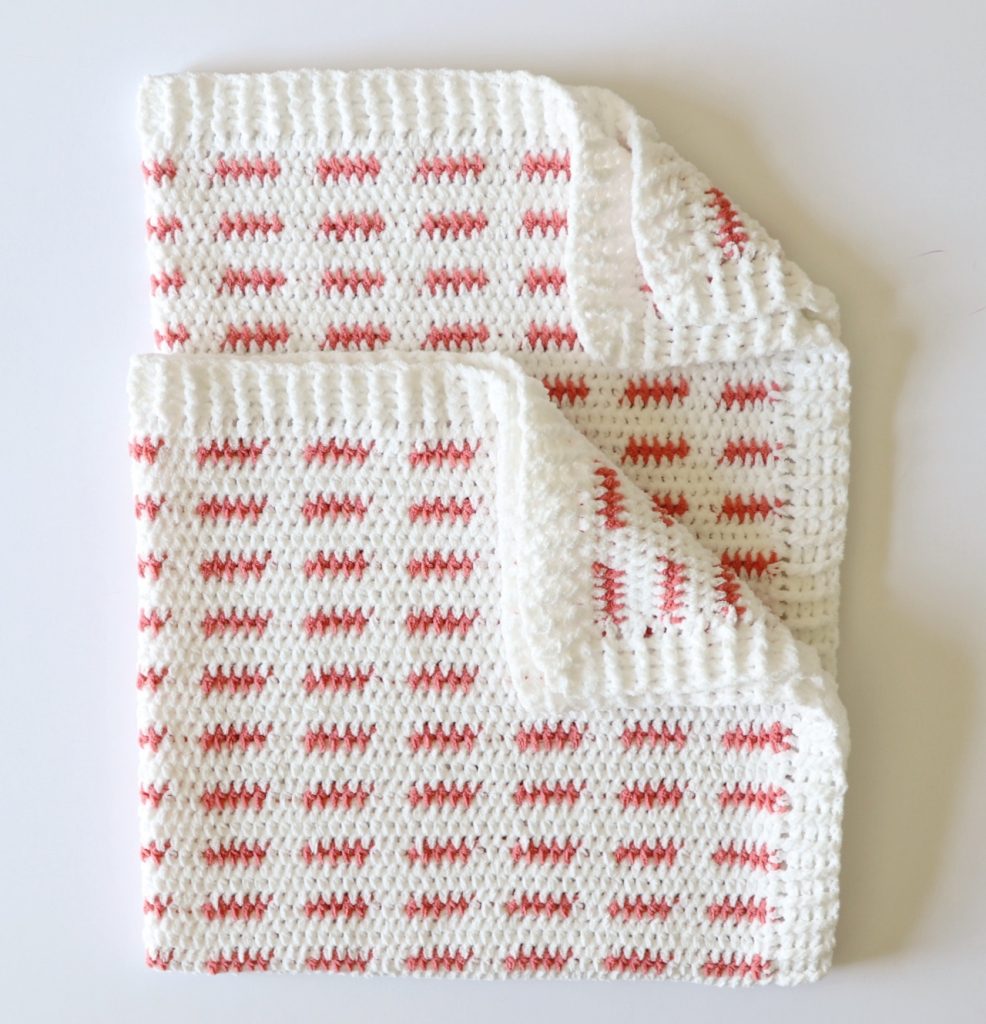
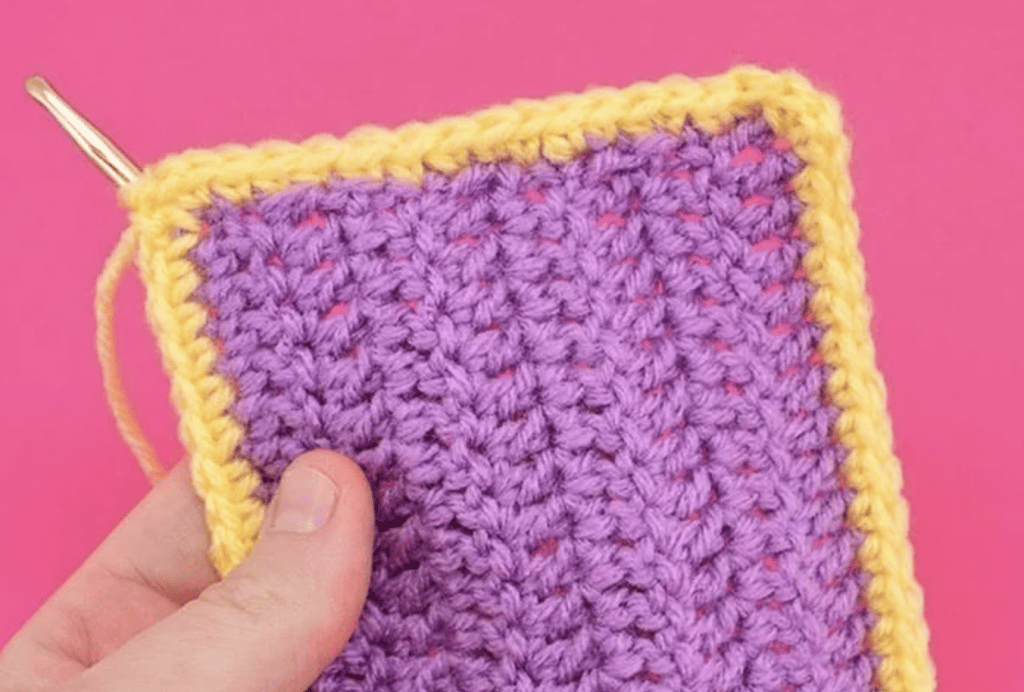
Flat & Simple Straight Border
With this step-by-step border tutorial, you will be able to create a straight border without any waving! If you want a border that lays flat, then this is the one for you to try. Border Tip: Use these single crochet stitches for baby blankets for a simple finish every time!
Find the free straight edge border tutorial at Kerry Jane Designs.
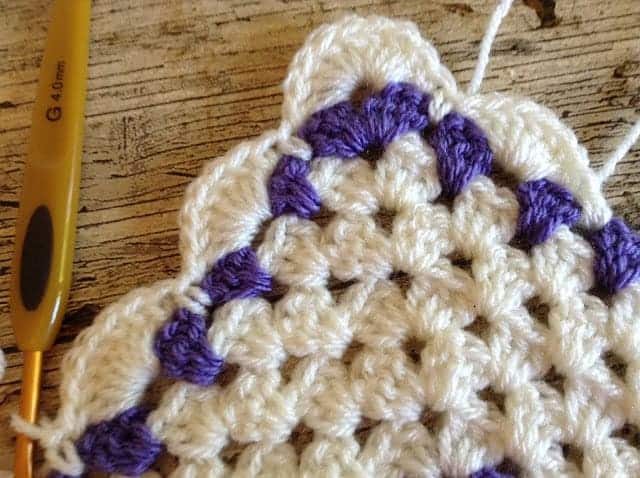
Scalloped Crochet Border
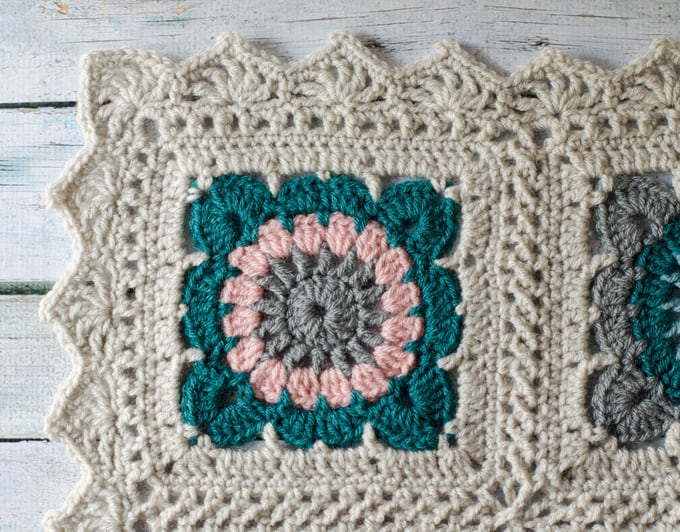
This beautiful scalloped blanket edging is perfect to add to your crochet blankets and afghans! You can give any blanket an heirloom look with these type of elegant borders, and this edging design looks great on connected blanket squares too!
Find the free scallop border tutorial with pictures to create a unique border at Crochet 365 Knit Too.
Moss Stitch Crochet Border
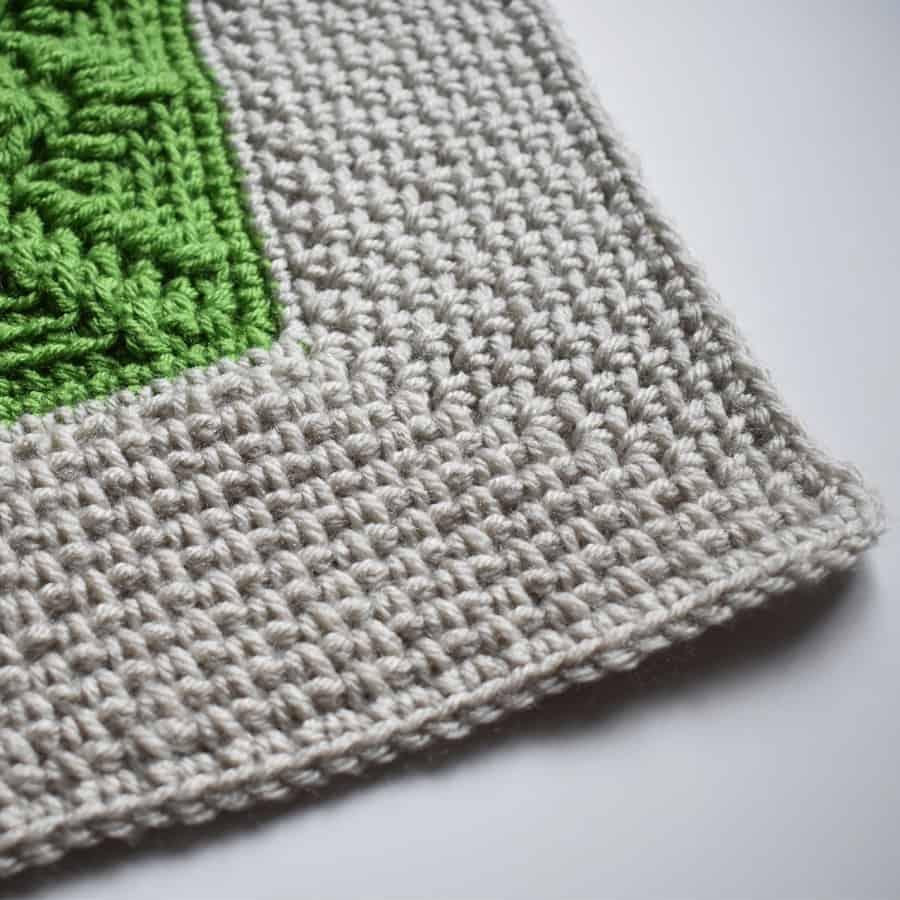
This simple Moss Stitch border crochet edging is the perfect way to get a clean edged look on any blanket. You can make this crochet border bigger or smaller depending on what you feel like crocheting, or add different colors for interest.
Find the free crochet moss stitch border tutorial from Every Trick on the Hook.
Single Crochet Border
Simple edging stitches like the single crochet can make the perfect crochet borders! This type of border helps to create a clean edge on almost any crocheted blanket pattern. Read on down to find the full photo tutorial and written pattern for this easy crochet border.